MultitrackStudio Remote
The MultitrackStudio Remote app for iPad turns an iPad into a powerful remote control for MultitrackStudio.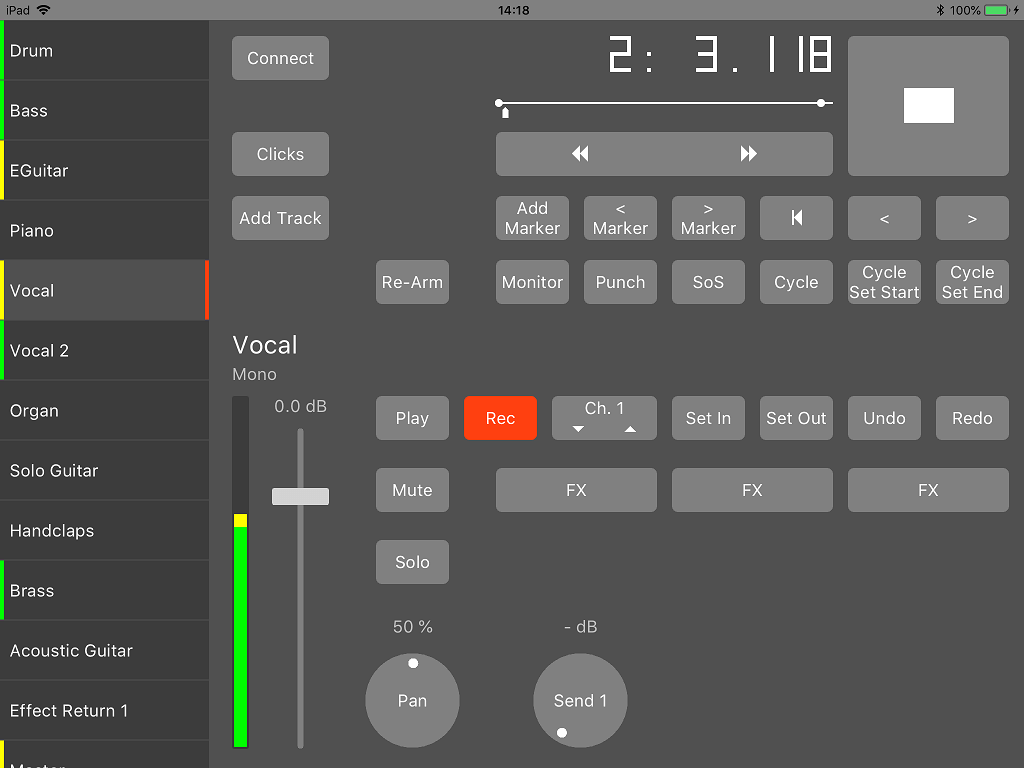 |
Connecting to MultitrackStudio
First, the MultitrackStudio Remote app needs to be installed. It's available from the App Store. Connecting to MultitrackStudio works like this:
- In MultitrackStudio, go to the Studio menu and choose Remote Control. Select the MultitrackStudio Remote preset.
- On the iPad, start the MultitrackStudio Remote app and tap the Connect button. Now enter the code that appears in the Remote Control Settings window and tap OK.
- Close the Remote Control Settings window.
The iPad must communicate via WiFi (5G etc. is not supported). Furthermore, the iPad and your computer must both be connected to your home network.
Tip: the code starts with the computer's IP address. If your computer has multiple network adapters you can simply replace it with the correct one.
Features
Using MultitrackStudio Remote, you can control many recording-related features:
- Control the transport, including VariSpeed, markers, and cycling.
- Add and control tracks, groups, effect returns (up to 3), and the master section.
- Add and control effects and MIDI instruments.
- Toggle the Monitor / Punch / Sound On Sound buttons.
- Control the click track and the MIDI Keyboard Mapper's Split option.
All mixer sections appear as tabs on the left. A signal indicator appears on the left hand side of the tab. It can be green, yellow, or red, corresponding to MultitrackStudio's level meter colors. A tab's right hand side shows a red bar if the track's Rec button is engaged. The lower half of the screen contains the current section's controls.
 |
Some lesser-used features aren't easily discoverable:
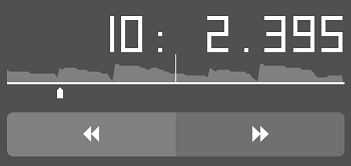
- The position counter can be tapped to switch between seconds and bars.
- Pressing the position counter for a second moves to the start of the nearest bar.
- Tapping a rotary knob centers it, but only if that makes sense (e.g., Pan, VariSpeed).
- In the Add Track window, you can tap the Add Track title to change it to Add Group / Effect Return.
- Moving a finger horizontally over the current tab (on the left) reveals a Remove button.
- The Set In and Set Out buttons can be pressed for a second to move the transport to the corresponding position.
- Pressing an effect slot for a second pops up the effect selector rather than the effect itself.
- Pressing the Solo button for a second enables "half solo" mode.
- Pressing the Play button for a second switches the track to practice mode.
- Pressing the start/stop button for a second starts cycling.